Getting started with Wi-LE projects, and Wi-LE examples
Start a Project
You can open the examples folder inside the SDK folder, if you strictly follow the instruction of installing the SDK manually it should be at ~/rogo-esp32-sdk/examples/, This folder contains all of the examples from ESP-IDF, open the folder named wile, which contains examples for Wi-LE based example projects.
*Currently, there is only one project available, which is “wile_switch”, so this doc will mainly explore the “wile_switch” project, other projects will be added in the future”
Project Introduction (wile-switch)
This is the very first project example of the Rogo ESP32 Wile SDK, which is a smart switch using Wi-LE protocol. On the hardware side, this smart switch will have 1-4 output ports for 1-4 devices. Thus, the firmware will support a hardware with 1-4 buttons/touch buttons correspond to 1-4 relays, and 1-4 LEDs indicator (either bicolor LEDs, or RGB LEDs ).
image of a Wile switch
Connect your device
similar to last part
Configure Your Project.
Navigate to your wile_switch directory, set WILE ESP32 device as the target, and run the project configuration utility menuconfig.
idf.py set-target esp32c3
idf.py menuconfig
You should first set the target with idf.py set-target {ESP32 chip name}.
Note
{ESP32 chip name} is the name of the ESP32 chip series inside your Wile product, e.g esp32c3, esp32s3, esp32c3,..etc… Currently Rogo ESP32 WILE SDK has only been tested and verified on the ESP32C3 series, thus, this document will mostly use esp32c3 in all examples. However, others ESP32 chip series may also works, you try it on your own by changing the idf.py set-target command with other targets and upload it to your compatible hardware !
If the previous steps have been done correctly, the following menu appears:
Project configuration - Home window
You are using this menu to set up project specific variables, e.g., Wi-Fi network name and password, the processor speed, etc.
Wile device parameter settings
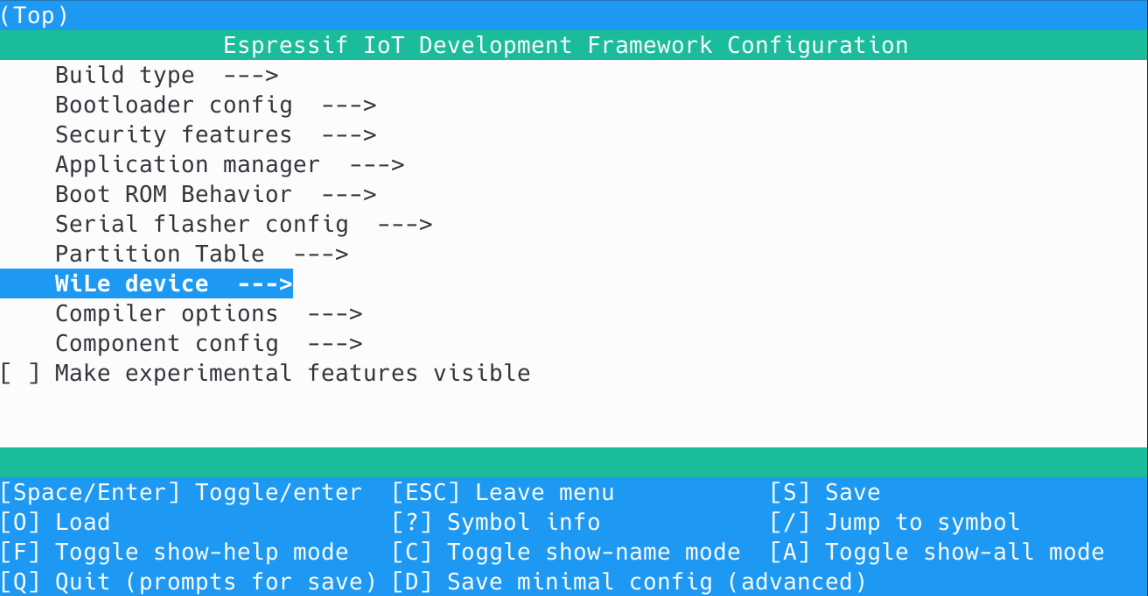
For WiLE Projects there is an additional submenu named Wile device, This menu contains configuration and parameters for the hardware of the Wile devices.
Project configuration - WILE device menu
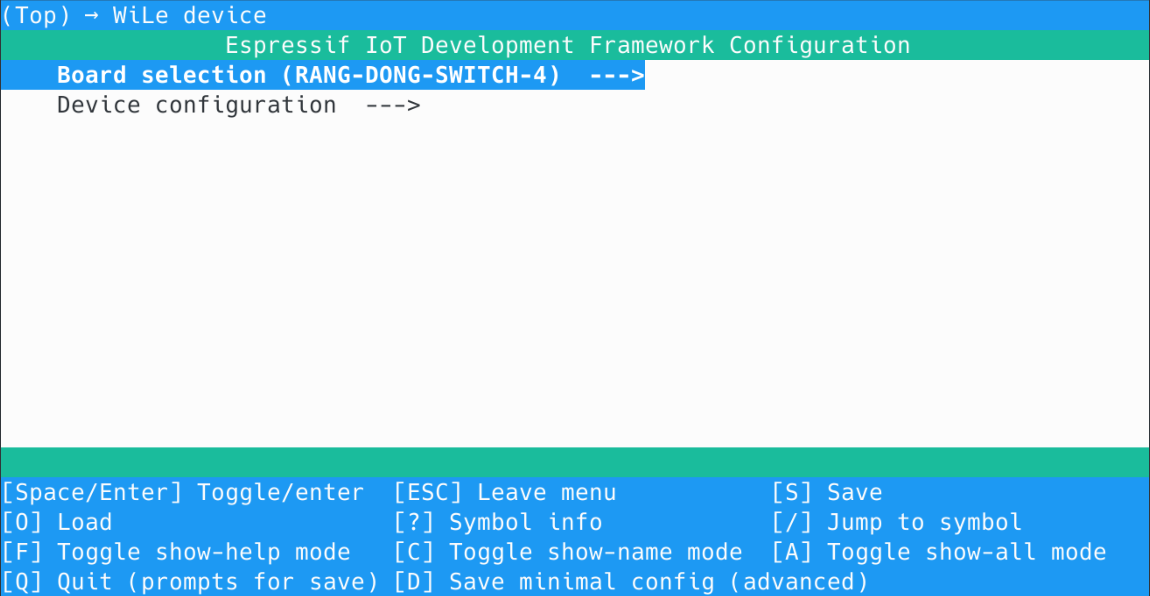
There are 2 options in this submenu, the first one is for choosing the board you are using, with Wile_switch example there are three options, choose the board according to your hardware, if your hardware doesn’t match any of those boards, you can open {project folder}/src/board.h to see if your board is compatible with any of those board. In addition, if none of those board matched, you can define your own board in side the board.h file, detail can be found at this part
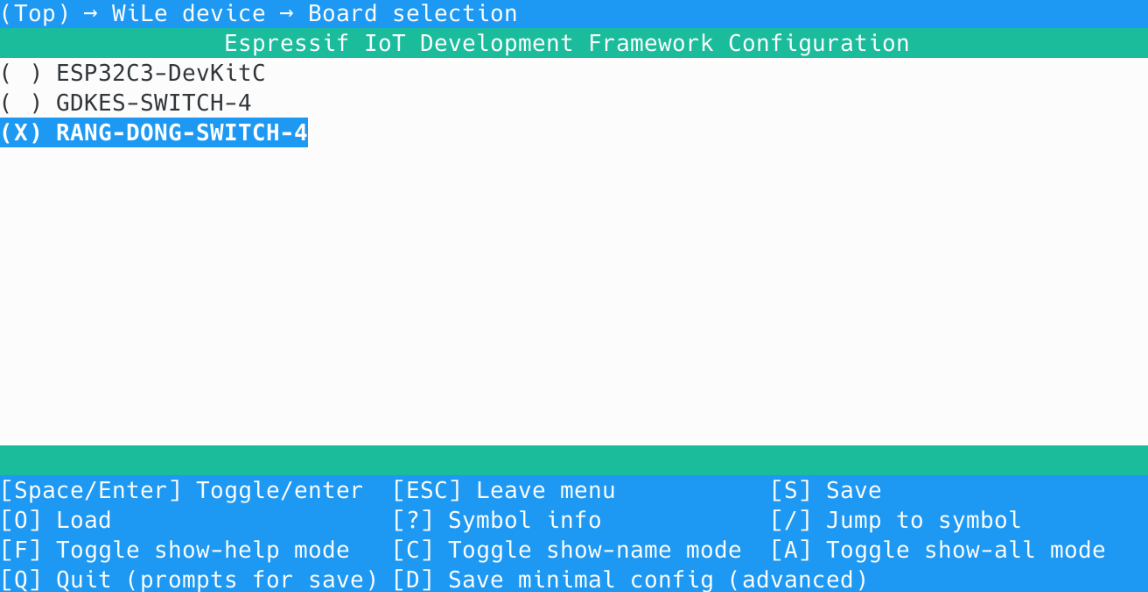
Project configuration - WILE device - Board Selection
The second option is to whether or not you want to enable factory test, this function is used at the manufacturer’s factory for the Quality Assurance process. For development you do not need to enable this feature, and for manufacturing, you can work with your OEM to come up with your own QA process.
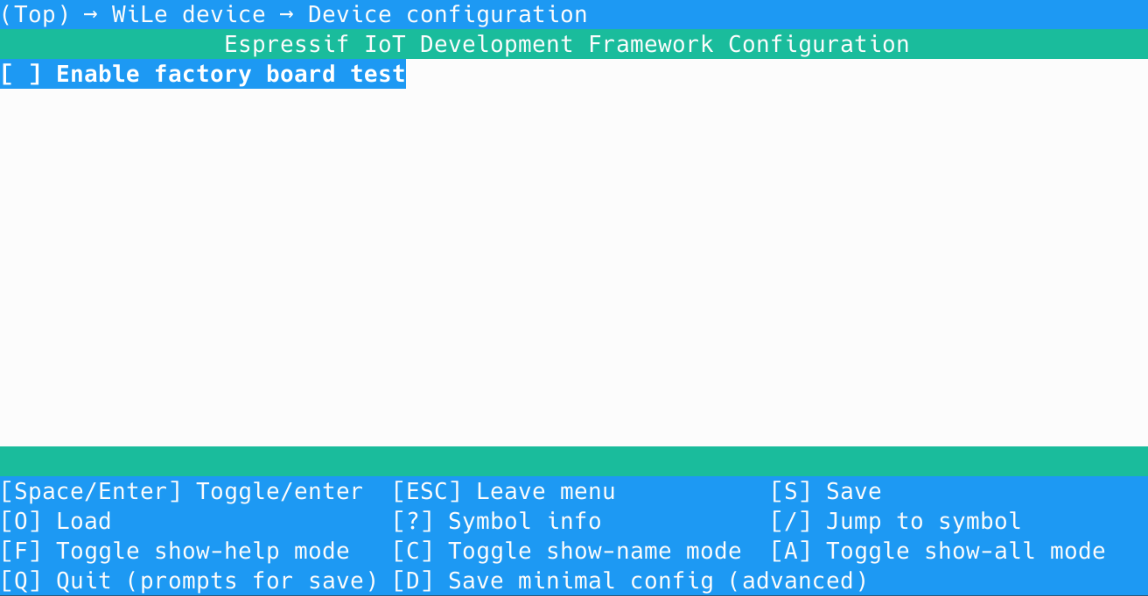
Project configuration - WILE device - Factory board test
Enable WILE and configure product ID
Before you can use Wile functionality in your project, you need first to enable it and config some of there parameters. Since this is an wile example project, it is already precongiged, but can find this setting at Project configuration -> Component Config -> WILE
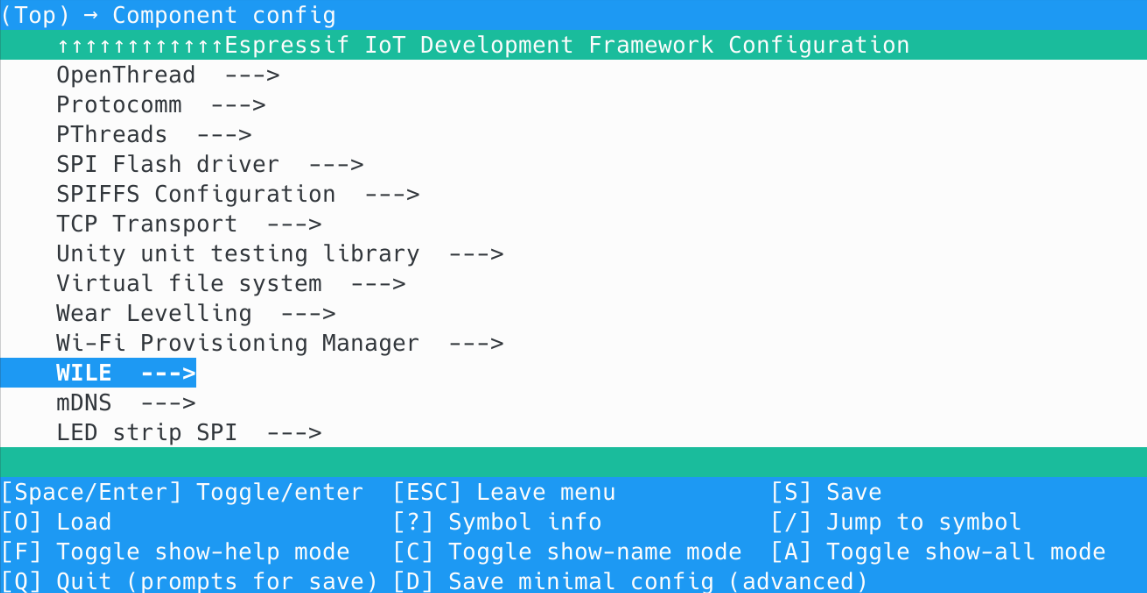
Project configuration - Component Config - WILE
Inside currently there is only one option WILE Configuration
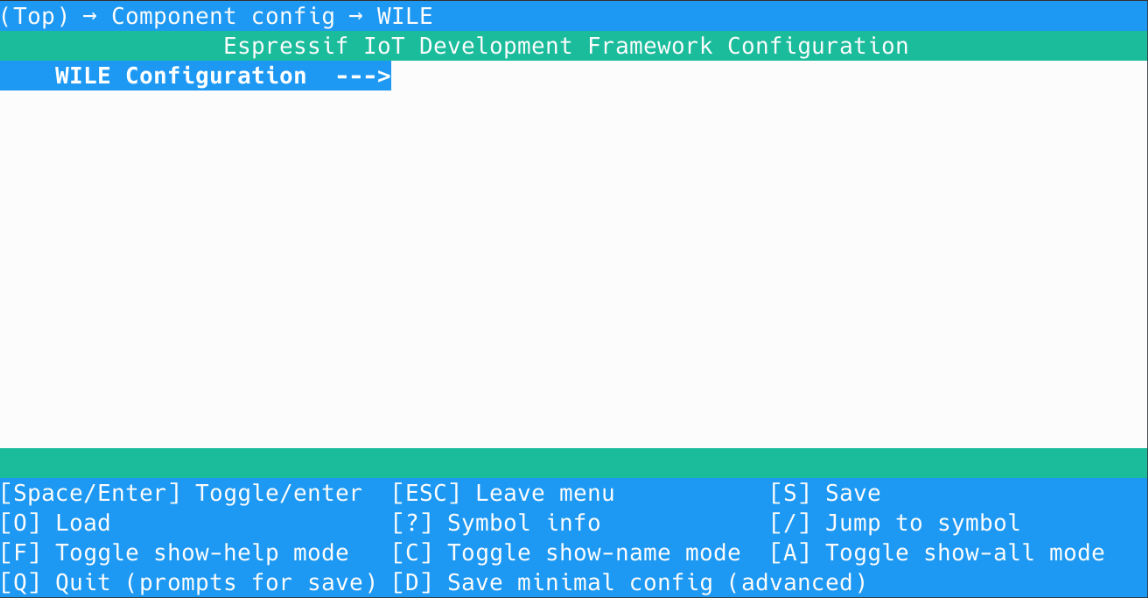
Project configuration - Component Config - WILE
Currently, you can choose to enable/disable Wile, and set the product ID here.
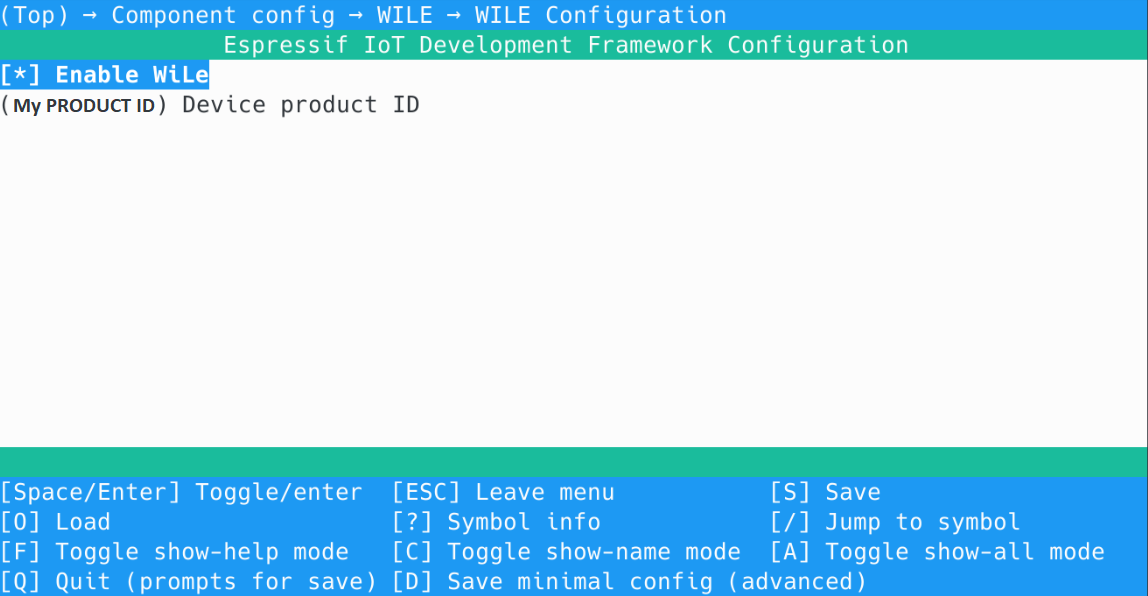
Project configuration - Component Config - WILE - WILE Configuration

Project configuration - Component Config - WILE - WILE Configuration - Device product ID
The Product ID is an unique ID of your product, which is registered to Rogo with unique set of feature. For this example you can just leave the default Product ID, the default product ID is a 4 buttons switch.
In order to obtain your own product ID for your devices with unique features , you can create one on Rogo’s Dashboard following this instruction.
Build, Flash, and Monitor
After finished Configure Your Project you can start building the example, the building process is identical to a normal projects, if you run into any problem, refer to this
If everything has been done correctly your monitor output should look like this :
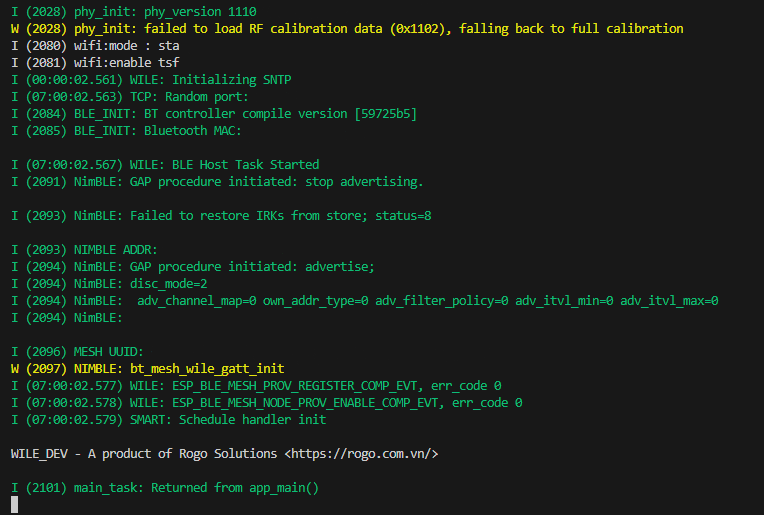
Output log of the wile_switch example at the first run
Exploring the wile_switch example
Adding device to Rogo app
Controlling devices
Automation
After toying with the wile_switch